Almost every website out there has a footer. And the ones who don't are most likely outdated, and doomed to fail.
Needless to say, if you want to be a developer, you need to understand the role of footer and how to implement it properly. Luckily for you, you've come to the right place.
In this article, we'll learn how to implement a footer component in React.
We'll start by creating a simple footer component, and then we'll add some additional features to it. By the end of this article, you'll know how to create a footer component that is both functional and stylish.
But first, let's start with a little overview of the footer component.
What Is Website Footer
A website footer is usually placed at the bottom section of a website. It consists of links to other pages on the site, contact information, and copyright information.
A footer is a great place for information that is important, and that you want visitors to be able to find easily.
Why Is Website Footer Important
You want your site visitors to find important information easily. And that's the exact purpose of a website footer. It also helps to navigate the site easily. And it also gives you a place to put all kinds of important links.
There are a few things you'll want to include in your website footer:
- Links to other pages on your site
- Contact information
- Copyright information
tip
You can also include other information, like a phone number, a link to your blog, or social media accounts.
Now that we know why is website footer important, and what information it should contain. Let's see how we can implement it using React.
Implementing Footer Component
In this section, I'll show you how to implement a footer component in React. And as it usually is, there are a few different ways to implement it.
The most common way is to create a separate Footer.jsx file and import it anywhere inside your App component tree.
tip
Another way is to create a footer component inside any other component. This is less common but can be useful if you only need a very simple footer, which doesn't require any complex logic.
To create a Footer.js file, start by creating a new file in your src directory and name it Footer.js. Then, add the following code to it:
Footer.jsx
const Footer = () => {
  const year = new Date().getFullYear();

  return <footer>{`Copyright © Upbeat Code ${year}`}</footer>;
};

export default Footer;
Now, in order to use this component, we need to import it and render it inside our application.
App.jsx
import Footer from "./Footer";

const App = () => {
  return (
    <div className="App">
      <Footer />
    </div>
  );
}

export default App
And there you have it. Your website has a working footer now. I'd like to say it's the end, but unfortunately, our work is not done yet. Although you added a footer inside your React application. We still need to place it at the bottom of the website.
Placing Footer to Bottom of the Page
To position a footer in the desired location, we need to apply additional styling to it. And it's no mystery we're going to use CSS for it. There are plenty of approaches we can use to place the footer at the bottom of the page. However, there are 2 options that we find most straightforward.
Placing Footer to a Fixed Position
In this scenario, we're going to fix the footer to the bottom of the page. And it will reside there no matter the scroll position. It's a very simple approach, but it has a downside. In this scenario, the footer will overlap the content behind it.
The page will look something like this.
To achieve this kind of behavior, we need to apply the following styling to our website.
styles.css
.App {
  font-family: sans-serif;
  min-height: 100vh;
}

footer {
  position: fixed;
  background-color: gray;
  bottom: 0;
  left: 0;
  right: 0;
  padding: 8px;
  text-align: center;
}
A little part of the actual content of the webpage is hidden behind the footer, but in some designs, this kind of behavior is necessary. If that's your case, you should definitely use the position: fixed for styling.
If this option doesn't work for your use case, you can implement the one below.
Pushing Footer to the Bottom of the Page
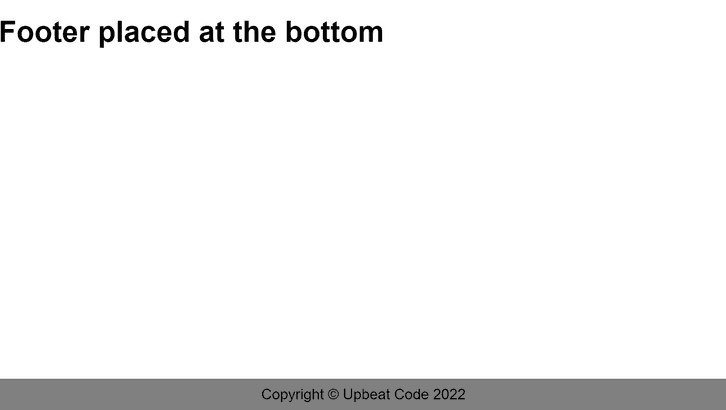
In this case, we want the footer to always be at the bottom of the page, but below the actual page content. The footer will reside at the bottom no matter what. It will be at the bottom of the page if the content fills the whole page, and also if it fills only a part of it. But no matter what, it will never overlap the actual page content.
The page will look like this.
To achieve this result, we need to apply the following styling to our website.
styles.css
body {
  margin: 0;
  padding: 0;
}

.App {
  font-family: sans-serif;
  min-height: 100vh;
  display: flex;
  flex-direction: column;
}

footer {
  background-color: gray;
  text-align: center;
  margin-top: auto;
  padding: 8px;
}
This way of displaying the footer is much more preferred on modern websites. And you can see it being used in almost every one of them. And if everyone else uses it, so can you!
Concluding Thoughts
When you think about it, implementing a footer component in React is relatively simple. All you need to do is create a new component and add it to your application. The problems arise when you need to style and position it properly.
And that's exactly what we learned in this article. At this point, you should know how to create a simple footer component in React. And you should also know how to apply CSS so it looks and behaves properly.
Now it's time to take all the footer knowledge you just absorbed. And start applying it to your React projects.


